






Sunday, February 21, 2016
Donovan Loves Being Vacuumed
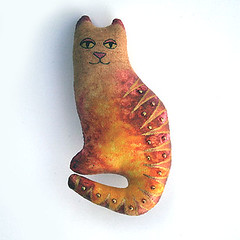
My 14 year old orange tabby loves to be vacuumed. He's the only cat I've ever had that didn't run from it.

Tuesday, February 2, 2016
Snowy Day

Saturday, November 29, 2014
The Evolution of the Dark Chocolate Zucchini Brownie

The recipe I started out with can be found here.
Ingredients:
- 1/2 cup vegetable oil
- 1 1/2 cups white sugar
- 2 teaspoons vanilla extract
- 2 cups all-purpose flour
- 1/2 cup unsweetened cocoa powder
- 1 1/2 teaspoons baking soda
- 1 teaspoon salt
- 2 cups shredded zucchini
- 1/2 cup chopped walnuts
- 6 tablespoons unsweetened cocoa powder
- 1/4 cup margarine
- 2 cups confectioners' sugar
- 1/4 cup milk
- 1/2 teaspoon vanilla extract
Directions:
1. Preheat oven to 350 degrees F (175 degrees C). Grease and flour a 9x13 inch baking pan.
2. In a large bowl, mix together the oil, sugar and 2 teaspoons vanilla until well blended. Combine the flour, 1/2 cup cocoa, baking soda and salt; stir into the sugar mixture. Fold in the zucchini and walnuts. Spread evenly into the prepared pan.
3. Bake for 25 to 30 minutes in the preheated oven, until brownies spring back when gently touched. To make the frosting, melt together the 6 tablespoons of cocoa and margarine; set aside to cool. In a medium bowl, blend together the confectioners' sugar, milk and 1/2 teaspoon vanilla. Stir in the cocoa mixture. Spread over cooled brownies before cutting into squares.
I made this recipe the first time without any changes except skipping the icing. Also, I used the Special Dark cocoa powder. I found the brownies to be very good but quite cakey so I set about modifying the recipe for a more fudgey brownie. I researched what makes brownies more cakey versus more fudgey and found that reducing egg, flour and baking soda should do it. So, I went about it the scientific way and changed one thing at a time. First I reduced the baking soda to 1/2 teaspoon. This definitely made the brownies less cakey, but they were still pretty cakey IMO. Next, I reduced the flour to 1 1/2 cups. They helped a LOT towards making the brownies more fudgey. Still not as fudgey as some I've had in the past. Next, I reduced the baking soda to just a scant 1/4 teaspoon. Next, I added more cocoa powder, bringing the amount up to 3/4 cup. Now these brownies are pretty fudgey! So, the ingredients for my current recipe is:
- 1/2 cup vegetable oil
- 1 1/2 cups white sugar
- 2 teaspoons vanilla extract
- 1 1/2 cups all-purpose flour
- 3/4 cup unsweetened cocoa powder
- 1/4 teaspoons baking soda
- 1 teaspoon salt
- 2 cups shredded zucchini
- 1/2 cup chopped walnuts (optional)
Cream Cheese Layer:
- 8 ounces (227 grams) full fat cream cheese, at room temperature
- 1/4 cup (65 grams) granulated white sugar
- 1/2 teaspoon pure vanilla extract
- 1 large egg
Ice Plant is Blooming and the Bees are Out
Today is a lovely day. The sun is shining and the temperature is in the upper sixties. Just two weeks ago the temperature was minus 10, so I was surprised to see anything growing, never mind blooming. But there are at least three varieties of ice plant blooming and the bees have found them. 

Monday, August 11, 2014
Extracting Honey
 |
| Honey Extraction |
Taking the supers and honey frames off the hives was pretty exciting in itself as the bees don't really like their hard earned winter food supply being taken from them. We smoked the bees a little to calm them down and used Bee Quick to chase them down out of the supers and into the lower deep boxes. It worked sort of well, but would've worked better if the weather had been warmer and sunnier. As it was, we got 3 supers and 25 frames full of honey off of the hives. Most of this came off the two older hives. We didn't get much of anything off the 3 hives that are new this year, but we didn't expect to.
 |
| Frame Before Uncapping |
 |
| Frame After Uncapping |
 |
| 12 Frame Extractor |
 |
| Extractor and Honey Bucket |
 |
| Bucket of Honey! |
 |
| Bucket with Honey Gate |
 |
| Honey! |
Sunday, March 31, 2013
Bringing in the Pollen
Today was a lovely warm sunny day. It was a great day for working in the yard, not only for me, but also for the industrious creatures out in the back of the yard. The bees were out collecting pollen to feed their young. I hope this means the queen is laying well and they're gearing up for all the apple blossoms that will be out in a few weeks. One week ago I saw white pollen coming in from the maple tree, but now the pollen is dark yellow to orange and looks very much like the pollen in all the crocus blossoms in the yard.
Saturday, March 9, 2013
A Kindle Kind of Day

Today is one of those days where it's best to just stay inside and read. It's cold, it's dull and the snow just keeps coming down and down. It's time to dig out the kindle and read one of the books I downloaded a while back.
A year ago I got a Kindle Touch for Christmas. It's great - there are lots of free or really cheap books on Amazon and I can check out ebooks from the library in a matter of minutes without leaving home. While I still think the printed page is easier to read, the Kindle is definitely easier on the eyes than my spouse's tablet.

I did miss the feel of a book in my hands and I wanted to protect my kindle, so I designed and made a leather cover for it. It wasn't hard, but it was time consuming. If you're interested in making a similar cover for your e-reader or tablet, here's how I made mine:
First I drew around my kindle on two pieces of stiff cardboard and cut them out. I then laid the cardboard pieces on top of some nice black leather and cut out two pieces of leather, adding a 1/4 inches around each piece. These pieces are the inner cover.
Then I stacked the kindle, the cardboard and the inner cover pieces to see how how thick they would be. This thickness is the width of the spine of the kindle cover. I laid the inner cover pieces of leather out on the rest of my leather, with the gap for the spine between them. Then I drew around them and cut that out for my outer cover.
I used a three prong leather punch to punch sewing holes all around the outside edges of the outer cover and the inner cover pieces.
Next, I cut out three leather tabs and one piece of black elastic to hold the kindle in the cover. Holes were punched in the ends of the tabs so they could be sewn onto the inner cover. I also cut out a tab to close the cover. I punched holes into it and into the back of the outer cover. I then sewed a button on the front of the outer cover. I hand sewed a button hole on the end of the tab.
I used a sewing awl and strong black leather thread to sew the entire thing together - sewing the tabs and elastic on the same time as the inner cover to the outer cover. The cardboard was then slipped in between the covers. This gives the kindle cover the same rigidity as the cover of a book.
All in all, I'm pleased with the result.
Subscribe to:
Posts (Atom)


