In my last Lucet post, I posted an image of the simple instructions included with the Lucets I sell. I thought it might be a good idea to do a more elaborate tutorial that includes some tips on what I've found helpful.
The lucets I use are ones I make. I've left off the handle found on some lucets since it just seems to get in the way. Also, I made them bigger than some, with a round bottom that fits comfortably in the palm of my left hand.
Tutorial:
1. Hold the lucet in your hand, cradling it comfortably in your palm. If you are right handed, hold it in your left hand, otherwise hold it in your right hand. Hold the ball of yarn, cotton string or whatever you will be making cord with in your other hand.
 |
| Cradle the lucet comfortably in your left hand |
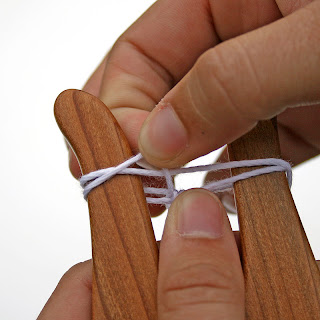
2. Pass the tail of the yarn through the hole in the lucet. Hold this tail with your thumb so the yarn won't slip while you wrap the ball end of the thread around the horns of the lucet. First, wind it around the front of the right horn, then over and in front of the left horn. The yarn should make a figure eight.
 |
| The yarn should make a figure eight around the horns |
3. Bring the yarn back across the front the of the right horn and hold it there. You can hold it in place by grabbing it between two fingers of the left hand behind the lucet while you do the next step.
4. Pinch the lower loop on the right horn between your thumb and finger of the right hand and pull it up and over the horn.
 | |
| Pull the lower loop up over the horn. |
5. Rotate the lucet right over to left. Then pull on the yarn to tighten the cord.
 |
| The lucet is rotated, cord tightened and the yarn is brought across the right horn again. |
6. Bring the yarn across the right horn again and grab the loop as before to bring it up and over the horn.
 |
| Grab the loop as before and bring it up and over the horn |
 |
| Loop is now over the horn |
7. Rotate the lucet right over left again and tighten the cord. You want to snug up the knot, but don't make it too tight or you won't be able to pull enough cord through this knot to continue.
 |
| Rotate the lucet and tighten the cord |
8. Repeat this step until the cord is long enough. The cord should have four sides.
 |
| Closeup of the cord |
9. To end the cord, cut the yarn a few inches from the loops. Thread it through the loop on the right horn. Slip this loop off the horn and pull on the yarn until this loop is closed. Then thread the end of the yarn through the loop on the left horn, slip this loop off and pull until this loop is closed.
10. Thread the end of the yarn through a large needle and hide the end of the yarn by taking a few stitches in the end of the cord and then cutting off the excess. Do this to the extra yarn at the other end of the cord as well.
Some more hints:
Starting a cord is the hardest part. You need to have a good grip on the end of the cord with your thumb while pulling the yarn tight. Once a few knots are made and the cord starts to take shape, it's much easier to continue. Try to keep even tension when pull the cord tight and the cord will be more consistent.
Some yarns are easier than others. Wool is nice and springy and makes a stretchier cord. Cotton can have a lot of friction when pulling the cord which can make it more difficult to pull a loop up, especially if the knot was pulled very tight. Rayon is more slippery and makes a very nice cord.
Some people might find it easier to start off giving the lucet one more turn and then pulling the yarn up over the left horn instead. I find it easier to do cotton this way. The yarn is then pulled tight before doing the next rotation.
1. First, I turn the lucet one more time to wrap the yarn around the left horn and then I grab the lower loop from the inside of the left horn.
2. Lift the loop up over the horn.
3. Pull the yarn to close the loop and snug up the knot.
4. All snugged up. Time to rotate the lucet again and repeat.


0 comments:
Post a Comment