Thursday, January 29, 2009

Check It Out - an Email Button


Now there's a way to email me from this blog page. Down on the right hand column, there's a button that looks just like the one above, but you can click it to email me. There's a tutorial on how to do this on Cathe Holden's blog.

Wednesday, January 28, 2009

Some New Items in the Shops


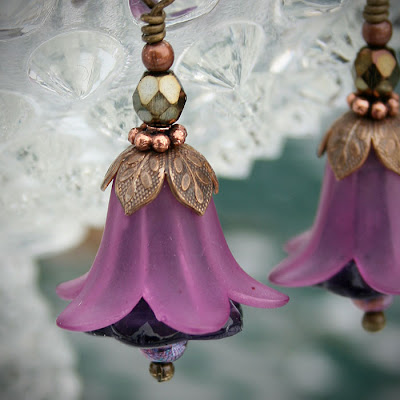
This is just a quick note to say I've added some items to my shops. The purple earrings above have been added to my ArtFire shop. And they've also been added to my poor, neglected little second Etsy shop, TabbyToo. I can put the earrings on both shops because I'll be making them fresh for whoever buys them.


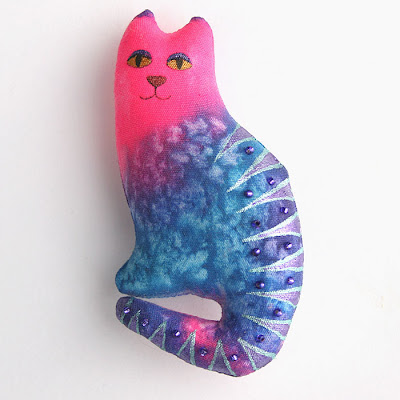
This pink, purple and blue hand dyed kitty pin has been added to the ArtFire shop also.


And this bright yellow and pink kitty pin has been added to my Etsy shop.

Monday, January 26, 2009

Spring Flower Earrings


I been craving flowers and gardening so much lately. I've ordered all my seeds for this year - probably more than I can fit into my gardens, and I've repotted up some of my hundred or so african violets. I've started geranium cuttings.

When actual plants weren't enough, I made flower fairies. And now I'm making flower earrings. I've always loved the look of aged copper and brass, but couldn't wear most brass or copper colored earwires. Then I discovered Vintaj nickel free earwires, so I ordered some to try. I also ordered some acrylic or lucite flower beads, dug out all my findings and many many glass beads and assembled some earrings.

The purple pair up at the top of this post is my favorite so far. I love purple tubular or bell shaped flowers such as penstemon, salvia, and especially clematis Roguchi.


I also made a tiny blue pair and a pinkish mauve pair with stamens. Making these was fun. Maybe I'll make some more and put some in my shops.


Friday, January 23, 2009

Lucet Cord


I've been working on a poet shirt for my spouse to wear as part of his Morris kit and it needed some cord. I wanted it to be white and non-slippery so it would stay tied and didn't really think a cut off shoe lace would look the best, so I got out my lucet and whipped up 4 feet of lucet cord while watching a few episodes of the Muppets.

I dug out some white pearl cotton I just happened to have and found my lucet. Lucets have been used for cord making for hundreds of year, possibly as far back as the Viking age. It typically has two prongs, although I have seen some four prong ones. I made this one a while back, along with others to be given away as largess at an SCA event. It's made out of walnut, using my scroll saw. I drew up the basic shape, modified it to be comfortable in my hand, cut it out and sanded it so all the edges are rounded and smooth. I experimented a bit with various wood finishes and settled on wax being the most comfortable surface for holding in my hand and sliding the string over the prongs on the lucet.

The process for making cord on a lucet is similar to that using a Knitting Nancy - the old four nails in a wooden spool that I made long rope things with as a kid. I'm not going to go into how to do it here since there are great web tutorials out there and some wonderful YouTube videos that do an excellent job of showing the process. Actually, there are several ways to make cord on a lucet, but this time I did the most simple and most common way which makes a nice square cord. I also use the lucet to make a nice flat cord suitable for trim.

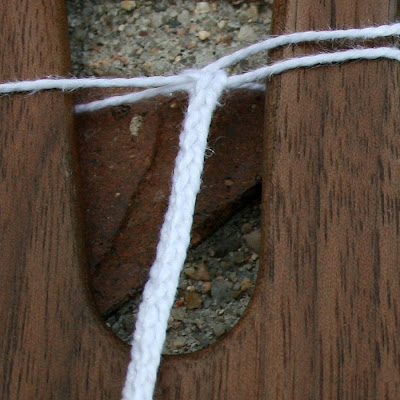
Here's a picture of the cord close up.

Thursday, January 22, 2009

Kitties Go Outside


Wednesday, January 21 was the warmest day so far this year, with a high into the seventies degrees Fahrenheit, so the kitties spent the day exploring their yard. This weekend it's supposed to get back down again with a a high in the thirties, so they'll probably spend all their time indoors where it's warm.
I spend a good part of the day doing some cleanup of dead annuals. Both Eric (above and Donny (below) spent much of their time investigating the terraces.


Donovan uses the terrace ledge as a pathway.

Tuesday, January 20, 2009

My May Day Hat


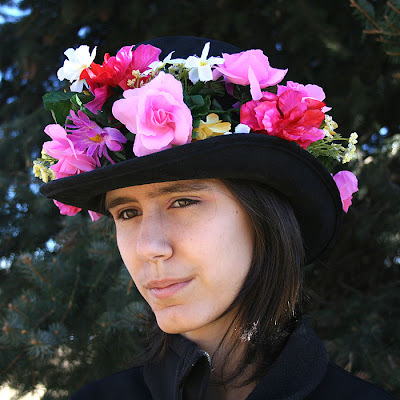
May is still a long time away, but the sale on spring garlands at Michael's inspired me to get my hat all ready for May Day. On May Day, the Maroon Bells Morris dancers dance the sun up and the following weekend they dance all around town. I'll be wearing my hat while playing for the dancers. The picture above has my daughter wearing it so I could take a picture. She looks better in it than I do. :-)

Monday, January 19, 2009

Potting Up Geranium Cuttings


It's that time of year - time to start my geranium cuttings. These geraniums are also known as pelargoniums, which is the genus name for them. Geranium is the genus name of those plants we know as hardy geraniums, an example of which would be Johnson's Blue. But many people know pelargoniums as geraniums, so that's what I'll call them.

Each fall I move my large pots of geraniums indoors where they spend the winter in a big southern window. They bloom quite well there, but by late winter, early spring, they start to get leggy. When this happens, I cut them back and use the cuttings to make knew geraniums for planting all over the yard. I often plant those that I overwintered in the big pots directly in the ground and plant fresh rooted geraniums into the big pots for the summer, which will be brought back in the following fall. The geranium in the top picture is one I've been reproducing for twenty years.

Unlike most things I root, geraniums don't seem to like the additional humidity provided by a ziplock baggie, terrarium, or other enclosure, but root just fine by just sticking the cutting into the soil in the pot and placing them in a window or under lights. So, I take the geranium trimmings, cut them to about 6 inches and remove most of the leaves from the lower stem. I leave about three or four leaves on, depending on the size and spacing of the leaves. It's best to remove the flowers, but in this case I left them on until after the photo was taken, just because they were pretty.

Here I've taken a cutting of the geranium, stripped the lower leaves, dipped the stem in Rootone (although geraniums root quite well without it too) and placed it into the soil in the pot. Besides rooting hormone, Rootone has a bit of fungicide in it that may protect the cutting a bit from rot from fungus. I always use a sterile, good quality potting soil, such as Sunshine Pro Mix. Besides being sterile, it has great drainage, which will help prevent rot.


Once I've watered it in well, I place the geranium pots in either my southern window or in my plant stand which has a four tube fluorescent bulb shop light fixture in it. The cuttings will need to stay moist, but never soggy and should never be in standing water.

Here's another geranium cutting potted up. It's a better example than the one above in that it has less leaf and stem above the soil.


Sometime in late March, early April, I'll move all my geranium cuttings out to my cold frames, where they will stay until they can be safely planted out in late May.

Friday, January 16, 2009

Kitty Fairy and Mermaid in Shop


I recently added a kitty fairy and a mermaid to my Etsy shop. Kitty is here and the mermaid is here.

Sunday, January 11, 2009

Wait, Wait... We're Not Dead Yet!


National Public Radio made fun of Morris dancing January 10th, the same day we danced out at a very well attended local event. Even though they made fun of our style of dance, we couldn't help but laugh until our sides hurt. Follow this link to another blog post which contains the link to the episode of "Wait Wait, Don't Tell Me".

Thursday, January 8, 2009

Waiting for Spring!


The seed catalogs are coming, and along with the occasional nice day outside, I'm getting anxious for spring. I've been placing plenty of online orders already and here's what I've ordered so far:
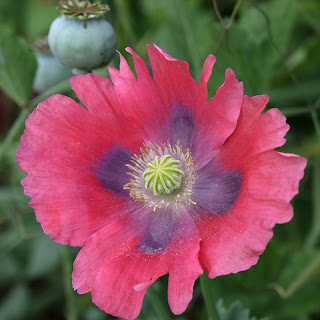
Morning Glory 'Xiong's Chinese', Amaranth 'Dreadlocks', Cosmos 'Rubenza', Delphinium 'Purple Passion', Morning Glory 'Scarlett O'Hara, Poppy 'Lauren's Grape', Rudbeckia 'Cherry Brandy', Sweet Pea 'Incense Mix', Poppy 'Danish Flag', Poppy 'Heirloom', Poppy 'Imperial Pink' (see picture below), Purple Bell Vine, Salvia - Gentian Sage, Sweet Pea 'Cupani's Original', Sweet Pea 'Mollie Rilestone', Tobacco - 'Jasmine', Butterfly Pea, Aster chinensis Moonshine Mixed, Clematis integrifolia seeds, morning glories Candy Pink, Cameo Elegance and Heavenly Blue (see above), salvia horminium Claryssa, sweet peas Zorija Rose, Wiltshire Ripple, Elegant Ladies, Scarlet Fire Celosia (see below), Black Peony Poppy, White Peshwar Poppy, Texas Hummingbird Sage, Tiger's Eye Mix Sunflower, Bolivian Rainbow Chile Pepper, tomatoes Sungold, Sweet 100, Amish paste, Better Boy, peppers Marconi, Gypsy, lots of beans, broccoli, brussels sprouts, corn and giant pumpkins.
I also need to start my geranium cuttings and get the plant stand ready for seed starts and cuttings.


Friday, January 2, 2009

Tutorial: Making a Tiny Doll Part 1 - using a Freezer Paper Pattern


This is a tutorial for making a simple small doll using a pattern made with freezer paper. The pattern is in the previous post:
Free Doll Pattern

I've been making small dolls virtually my whole life, but when I discovered the use of freezer paper about a decade ago, it made my life quite a bit easier. Freezer paper has a plastic coating on one side that enables it to temporarily stick to fabric without leaving any residue when removed and the pattern can be used over and over again. I have some freezer paper patterns that are 5 years old and have been used hundreds of times, although they are getting a bit ratty with use.


Freezer paper can be found in the grocery store and comes in a roll. Some cloth doll supply companies even sell it in nice flat sheets that can be used in your printer.


I draw all my pattern prototypes directly on the freezer paper, but you can see through it enough to trace a pattern on it too. Draw the pattern on the paper side of the freezer paper, not the plastic side.


Once the pattern is drawn on the freezer paper, cut the pattern out right along the line. This will be your sewing line.


Double the fabric, wrong sides out. Since we're using a fairly hot iron, I recommend a cotton fabric. My favorite fabrics are Southern Bell and the Egyptian cotton fabric sold at Joann's Fabrics because they have a nice tight smooth weave that makes it easier to turn tiny cloth dolls without seam blow outs.
Iron the pattern plastic side down onto the wrong side of the fabric using a dry iron. Now, some irons get hot enough to melt the plastic coating on cotton setting, so if you have a hot iron, use wool setting. My old iron doesn't melt the plastic even on the hottest setting, but it's old and well used. If in doubt, use a cooler setting and if the pattern doesn't stick, bump up the heat to the next level.


Let the pattern cool on the fabric.


Sew right up along the edge of the pattern using a tiny stitch. I set my old Singer to stitch setting 15. Leave an area open for turning as indicated on the pattern.

When done sewing, peel the pattern off and cut out the doll leaving about 1/8 inch seam allowance. Clip curves, turn, stuff and embellish however you'd like.

Next tutorial will be about turning and stuffing a tiny doll.

Free Doll Pattern


Here's a tiny doll pattern I just made for the tutorial that will be my very next post. It makes a tiny little doll just under 3 1/2 inches tall. Click on the image to bring up the full size pattern and print it at 200 DPI.