Showing posts with label tutorial. Show all posts

Tuesday, November 6, 2012

Lucet Tutorial - Square Cord


In my last Lucet post, I posted an image of the simple instructions  included with the Lucets I sell.  I thought it might be a good idea to do a  more elaborate tutorial that includes some tips on what I've found helpful.

The lucets I use are ones I make. I've left off the handle found on some lucets since it just seems to get in the way. Also, I made them bigger than some, with a round bottom that fits comfortably in the palm of my left hand.

Tutorial:

1. Hold the lucet in your hand, cradling it comfortably in your palm. If you are right handed, hold it in your left hand, otherwise hold it in your right hand. Hold the ball of yarn, cotton string or whatever you will be making cord with in your other hand.
Cradle the lucet comfortably in your left hand

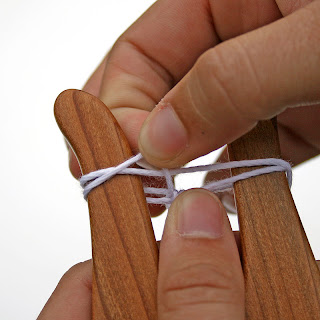
2. Pass the tail of the yarn through the hole in the lucet. Hold this tail with your thumb so the yarn won't slip while you wrap the ball end of the thread around the horns of the lucet. First, wind it around the front of the right horn, then over and in front of the left horn. The yarn should make a figure eight.
The yarn should make a figure eight around the horns

3. Bring the yarn back across the front the of the right horn and hold it there. You can hold it in place by grabbing it between two fingers of the left hand behind the lucet while you do the next step.

4. Pinch the lower loop on the right horn between your thumb and finger of the right hand and pull it up and over the horn.
Pull the lower loop up over the horn.

5. Rotate the lucet right over to left. Then pull on the yarn to tighten the cord.
The lucet is rotated, cord tightened and the yarn is brought across the right horn again.

6. Bring the yarn across the right horn again and grab the loop as before to bring it up and over the horn.
Grab the loop as before and bring it up and over the horn
Loop is now over the horn

7. Rotate the lucet right over left again and tighten the cord. You want to snug up the knot, but don't make it too tight or you won't be able to pull enough cord through this knot to continue.
Rotate the lucet and tighten the cord

8. Repeat this step until the cord is long enough. The cord should have four sides.

Closeup of the cord

9. To end the cord, cut the yarn a few inches from the loops. Thread it through the loop on the right horn. Slip this loop off the horn and pull on the yarn until this loop is closed. Then thread the end of the yarn through the loop on the left horn, slip this loop off and pull until this loop is closed.

10. Thread the end of the yarn through a large needle and hide the end of the yarn by taking a few stitches in the end of the cord and then cutting off the excess. Do this to the extra yarn at the other end of the cord as well.

Some more hints:
Starting a cord is the hardest part. You need to have a good grip on the end of the cord with your thumb while pulling the yarn tight. Once a few knots are made and the cord starts to take shape, it's much easier to continue. Try to keep even tension when pull the cord tight and the cord will be more consistent.

Some yarns are easier than others. Wool is nice and springy and makes a stretchier cord. Cotton can have a lot of friction when pulling the cord which can make it more difficult to pull a loop up, especially if the knot was pulled very tight. Rayon is more slippery and makes a very nice cord.

Some people might find it easier to start off giving the lucet one more turn and then pulling the yarn up over the left horn instead. I find it easier to do cotton this way. The yarn is then pulled tight before doing the next rotation.

1. First, I turn the lucet one more time to wrap the yarn around the left horn and then I grab the lower loop from the inside of the left horn. 

2. Lift the loop up over the horn.

3. Pull the yarn to close the loop and snug up the knot. 


4. All snugged up. Time to rotate the lucet again and repeat. 

Monday, August 27, 2012

How To Make a Hypertufa Pot cont.

This post is a continuation from:
How To Make a Hypertufa Pot

 After letting the pot cure for about 24 hours, unwrap it and check it by poking a finger in it. It should not be at all squishy, but quite firm. You should be able to dent it with a finger nail, but not a finger. If you can push in a dent with just the finger, it won't hold it's shape when you unmold it. If it's still too soft, wrap it back up and leave it for a few more hours and check again. Make sure it's still moist and spray mist it if needed.

Once it's firm enough, carefully tip the pot out of the mold. Don't bang it or drop it since it's still quite fragile. The plastic lining should help it drop right out of the mold and you'll just have to peal the plastic off of it.

The holes might have closed up a bit or skimmed over. Open them up.

Now you can rough up the surface with a wire brush, or gently carve lines into the sides.

I rough up the entire surface because I like to make it look more rock like and hide some of the lines created by using the plastic trash bag. Also, it exposes the perlite and vermiculite for a more textured appearance. Be gentle since it's still quite fragile.

Once I've got it the way I want it, I put it back on the plastic.

I wet it down.

Then I wrap it up again to seal in the moisture.

Here it is, all wrapped up, ready to be moved to a shady location for a couple of weeks.

After a couple of weeks it should be pretty hard. I then finish the cure by unwrapping the pot and completely immersing it in water for another week or two.  The water will need to be changed every few days. This will help leach out the lime in the surface of the pot so it won't hurt the plants. Once this is done, the pots are ready to plant.

Here are a bunch that just finished their final soak. Once they dry out, the color will be much lighter.

Saturday, August 25, 2012

How to Make a Hypertufa Pot


Hypertufa is a rock like substance made from cement that works great for outdoor pots. It's porous so plants that like good drainage do well in pots made from it and it survives freezing and thawing much better than pots made from terracotta. I plant many of my winter hardy succulents in pots made from hypertufa. It's not hard to make so I make most of my own pots. Here is a tutorial on how I do it.

To make hypertufa, I use the following materials and items:
1. Portland cement
2. Vermiculite or perlite
3. Spagnum peat moss
4. A container suitable for a mold
5. Large plastic garbage bag
6. Water
7. Protective gloves
8. Dust mask
9. Wire brush such as a cheap grill brush
10. Clothes I don't care about
11. Colorant (optional)

First, the dry ingredients are mixed together. These will be 1 part Portland cement, 1 part spagnum peat and 2 parts either vermiculite or perlite. Sometimes I use 1 part perlite and 1 part vermiculite. Some powdered colorant can be added at this time as well. For a bowl as big as pictured below, 1/4 to 1/2 cup of powdered colorant will color up the mix nicely. Make sure to use fresh, non-hardened Portland cement. If it has sat around in a humid area or gotten wet, it will have hard lumps in it and be useless. Also, make sure you buy just Portland cement. You don't want to buy pre-mixed concrete or mortar. Home Depot carries it in 45 pound bags which is the smallest I found so far.

Use enough ingredients to almost fill the mold you will be using. The mixture will be compressed quite a bit so there will be plenty of empty space in the middle when you are done. I often use a wheelbarrow to mix up the ingredients if I'm makinng something large.

Mix the ingredients very thoroughly. The dry colorant won't show up. Don't worry, it will later when the water is added. Be sure to do this with gloves and a dust mask on. The cement is very very harsh on skin and the dusk is not safe to breath.

Add water slowly and mix.

Mix thoroughly by hand. If you added powdered colorant, the color will start to show now.

Keep slowly adding water and mixing until you can make a ball of the mixture. Squeeze some together. It should not fall apart, nor should it slump down. It should hold it's own shape if lightly tossed from hand to hand. If squeezed tightly in the hand, a bit of water should ooze through the knuckles.I find that the total amount of water used varies somewhat, but it's more important to get the texture right than trying to use the same amount of water each time.

Get your mold ready. The mold should be stiff so it can support quite a bit of weight and smooth so it will release the pot. Make sure it doesn't get narrower towards the top or you'll never get the pot out.

Cut a large trash bag down the sides so it opens up flat and place it in the mold. Here, I am reusing one so it looks dirty. If you do that, make sure the dirty side is on the inside and not touching the mold sides or it could stick to the mold when you're trying to get the pot out.

Place the hypertufa mixture in the mold. It may look like too much, but it'll compress when you form it to the mold.

Now you can shape it to the mold. Go around the edge, pulling mixture from the center to the edges and squeeze against the edge of to mold the compress the mixture.  The walls should be about 1 1/2 inches thick for this size pot. For pots half this size you can get away with walls a generous 1 inch thick.

Keep going around the pot, squeezing the sides against the mold and pressing down on the top to compress it. If it isn't compressed, and is just crumbly, then it will fall apart later.

I go around 3 or 4 times, constantly shaping the sides and edges. If the mixture is not too wet, it should mostly stay up by itself with very little slumping.

Once I am pretty satisfied with the sides and edges, I poke a finger in the bottom to make sure it's thick enough. If not, I scrape away some of the sides for the bottom. It should be about 1 1/2 inch thick for a pot this size.

The bottom needs compressing too, as well as the lower part of the sides.


Now it's time to poke drainage holes in the bottom. I just use my finger and make the holes pretty big. They'll close up a little, but that will be taken care of later.


Make sure to put enough holes for good drainage.

Once the holes are done and the pot is the way you want it, it's time to wrap it up to keep it moist for a while. Portland cement has to stay moist in order to cure. It doesn't harden from drying out, instead it forms a chemical bond with water and that's what makes it hard. Therefore you want it to stay moist as long as you can so all the cement will form this bond.

Tuck the plastic all around the edges to seal the moisture in and gently place it in the shade for about 24 hours. If you bump and jiggle it too much it will slump.


Clean all the mixing bowls, tools, wheel barrow, etc. to get the cement off, otherwise it will harden and stick to them.

Since this post is getting quite long, I'll stop now and continue on how to unmold and cure the pot in the next post.

Tuesday, November 10, 2009

How I Put Paypal Buttons on my Blog

I've had a few requests for how I learned to put Paypal buttons on my blog. It turns out that it's incredibly easy!
I just followed the instructions in this YouTube video:
Adding Paypal buttons

Friday, January 2, 2009

Tutorial: Making a Tiny Doll Part 1 - using a Freezer Paper Pattern


This is a tutorial for making a simple small doll using a pattern made with freezer paper. The pattern is in the previous post:
Free Doll Pattern

I've been making small dolls virtually my whole life, but when I discovered the use of freezer paper about a decade ago, it made my life quite a bit easier. Freezer paper has a plastic coating on one side that enables it to temporarily stick to fabric without leaving any residue when removed and the pattern can be used over and over again. I have some freezer paper patterns that are 5 years old and have been used hundreds of times, although they are getting a bit ratty with use.


Freezer paper can be found in the grocery store and comes in a roll. Some cloth doll supply companies even sell it in nice flat sheets that can be used in your printer.


I draw all my pattern prototypes directly on the freezer paper, but you can see through it enough to trace a pattern on it too. Draw the pattern on the paper side of the freezer paper, not the plastic side.


Once the pattern is drawn on the freezer paper, cut the pattern out right along the line. This will be your sewing line.


Double the fabric, wrong sides out. Since we're using a fairly hot iron, I recommend a cotton fabric. My favorite fabrics are Southern Bell and the Egyptian cotton fabric sold at Joann's Fabrics because they have a nice tight smooth weave that makes it easier to turn tiny cloth dolls without seam blow outs.
Iron the pattern plastic side down onto the wrong side of the fabric using a dry iron. Now, some irons get hot enough to melt the plastic coating on cotton setting, so if you have a hot iron, use wool setting. My old iron doesn't melt the plastic even on the hottest setting, but it's old and well used. If in doubt, use a cooler setting and if the pattern doesn't stick, bump up the heat to the next level.


Let the pattern cool on the fabric.


Sew right up along the edge of the pattern using a tiny stitch. I set my old Singer to stitch setting 15. Leave an area open for turning as indicated on the pattern.

When done sewing, peel the pattern off and cut out the doll leaving about 1/8 inch seam allowance. Clip curves, turn, stuff and embellish however you'd like.

Next tutorial will be about turning and stuffing a tiny doll.